How to Install DirtBound High Clearance Steering (OTK vs UTK)
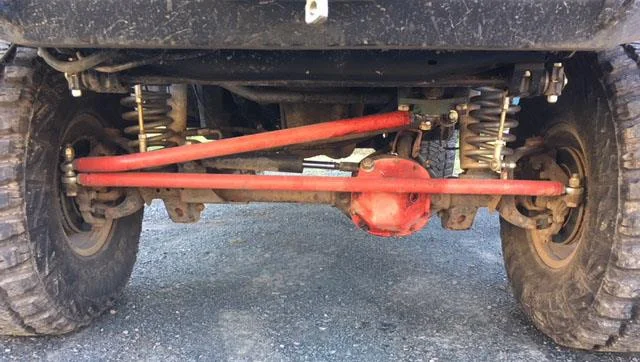
DirtBound High Clearance Steering can be run Over the Knuckle (OTK) or Under the Knuckle (UTK). This guide walks you through choosing the right setup and installing it start to finish. Read it all the way through once before you pick up a wrench.
Before you start
Steering is a safety-critical system. A mistake here can cause loss of control on the road or trail.
- If you have never installed steering components and don't have an experienced mechanic helping you, have this kit installed by a professional shop.
- If anything in this guide is unclear, stop and ask. Getting it wrong can damage your Jeep and cost more than the install.
- Always support the vehicle on jack stands rated for its weight. Never work under a vehicle held up only by a jack.
- Plan on a professional alignment after the install.
What you need
Tools
- Power drill
- 5/8" drill bit (a few smaller step-up bits help keep the hole straight)
- Cutting fluid
- 2 large adjustable wrenches (or the correct size sockets/wrenches)
- Torque wrench
- Floor jack and jack stands
- Tape measure (for setting toe)
Hardware in the kit
- 3" bolt: Driver side knuckle
- 5" bolt: Passenger side knuckle (tie rod + drag link stack)
- 4" bolt: Pitman arm
The same bolts go in the same locations for both OTK and UTK. Only the direction of the stack changes.
Step 1: Choose OTK or UTK
Your track bar setup decides which configuration to run. Pick one before you start drilling.
- Stock track bar bracket: run UTK (Under the Knuckle), then follow Step 4B
- Track bar relocation bracket: run OTK (Over the Knuckle), then follow Step 4A
Step 2: Remove the factory steering
- Park on level ground, set the parking brake and chock the rear wheels.
- Raise the front and support it on jack stands. Remove the front wheels if it gives you better access.
- Point the front wheels straight ahead and note the steering wheel position.
- Remove the factory tie rod and drag link from the knuckles and pitman arm.
- Toss the factory steering in the nearest trash can. You won't need it.
Step 3: Drill the knuckles and pitman arm
The factory tapered holes get opened up to a straight 5/8" hole so the heim joint bolts fit.
- Drill the tie rod/drag link holes in both knuckles and the pitman arm to 5/8".
- Use cutting fluid and moderate drill speed. Step up through smaller bits if needed.
- Keep the drill square to the arm so every hole is straight and true. A crooked hole will cause binding and uneven wear.
- Deburr each hole and test-fit a bolt. It should slide through without forcing.
Step 4A: Install — Over the Knuckle (OTK)
In OTK, the tie rod and drag link sit on top of the knuckle arms. Use this if you run a track bar relocation bracket.
Finished OTK install
1. Driver side knuckle — 3" bolt. Mount the tie rod heim on top of the driver knuckle. Match the spacer and washer order in the photo.
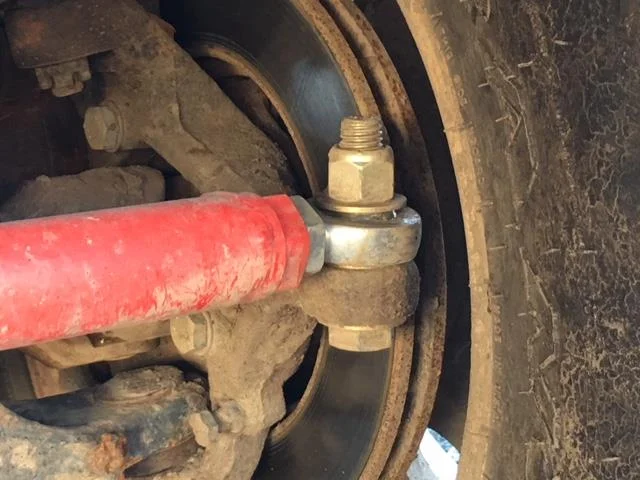
2. Passenger side knuckle — 5" bolt. Stack the tie rod heim and the drag link heim on top of the passenger knuckle with the spacers shown. The drag link sits above the tie rod.
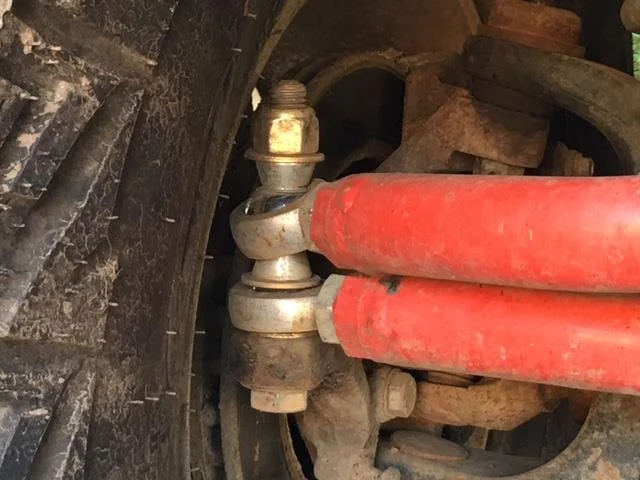
3. Pitman arm — 4" bolt. Attach the other end of the drag link to the pitman arm, matching the order in the photo.
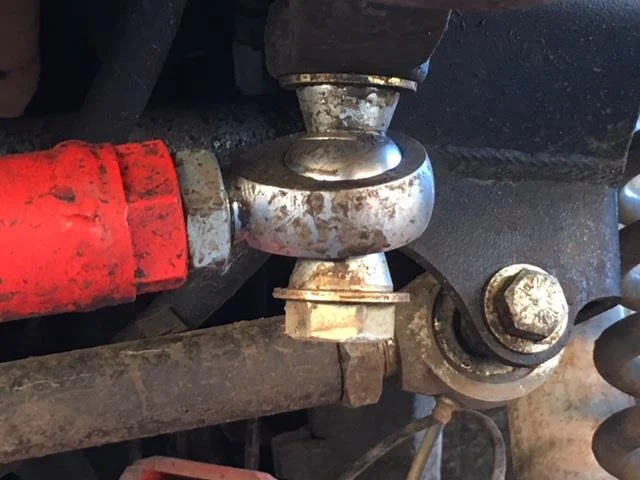
Snug all bolts, then go to Step 5.
Step 4B: Install — Under the Knuckle (UTK)
In UTK, the tie rod and drag link hang below the knuckle arms. Use this if you run the stock track bar bracket.
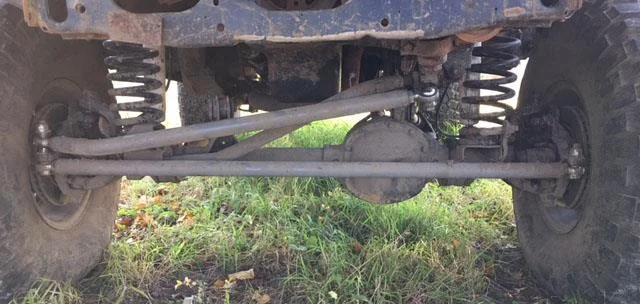
Finished UTK install
1. Driver side knuckle — 3" bolt. Mount the tie rod heim under the driver knuckle. Match the spacer and washer order in the photo.
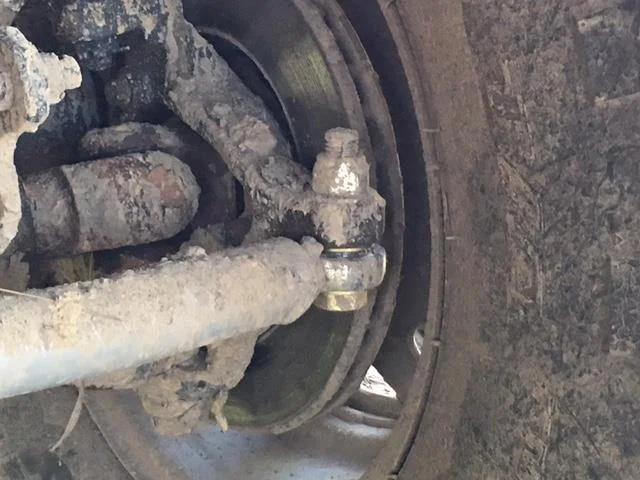
2. Passenger side knuckle — 5" bolt. Stack the drag link heim and the tie rod heim under the passenger knuckle with the spacers shown.
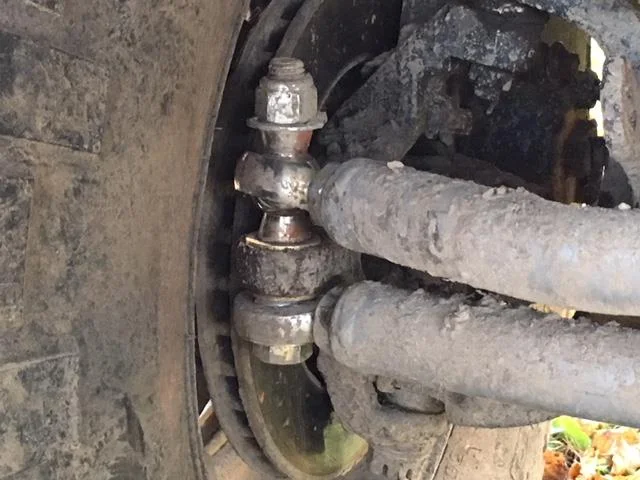
3. Pitman arm — 4" bolt. Attach the other end of the drag link to the pitman arm, matching the order in the photo.
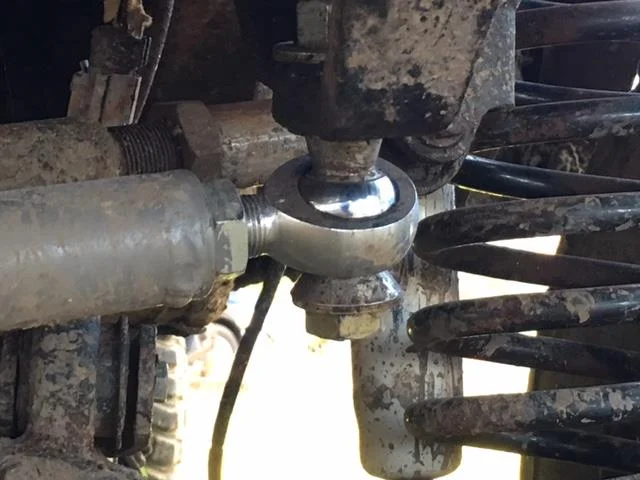
Snug all bolts, then go to Step 5.
Step 5: Center, set toe and torque
- With the wheels straight ahead, adjust the drag link length so the steering wheel is centered.
- Adjust the tie rod length to set toe. Measure across the front and back of the tires at hub height. A starting point of about 1/16" to 1/8" toe-in will get you to the alignment shop.
- Tighten all heim jam nuts against the tubes.
- Torque the 3", 4" and 5" bolts (5/8"-18 fine thread, Grade 8) to 180 ft-lb.
Step 6: Final checks
- Turn the steering lock to lock. Nothing should bind or hit the tires, springs, track bar or differential.
- Cycle the suspension (or flex it) and check for clearance at full stuff and droop.
- Confirm every misalignment spacer is in place and every nut is torqued.
- Reinstall the wheels and torque the lug nuts.
- Test drive slowly in a parking lot before hitting the road.
- Get a professional alignment.
- Re-check all bolt torque after the first 50 miles, and after every trail run.
Questions?
If something doesn't look right or you're not sure which setup fits your build, reach out before you drill. We'd rather answer a question than have you guess.